Creating a Rest API Effortlessly with Spring Rest Repositories
If you have been swayed away from Java since web frameworks like Django, Rails, Sinatra, and Flask started popping up to fulfil your Restful needs, I’ve got news for you; It is time to come back.
Using Spring Boot and Spring Data Rest, we can now develop a fully restful endpoint in just a few super easy steps. If you don’t believe me, keep reading. You will turn into a Spring Boot fanatic like me in just 6 steps from now.
For our example, we will create a simple Rest endpoint to manage a table of favorite beers.
1. Generate a Spring Boot Project
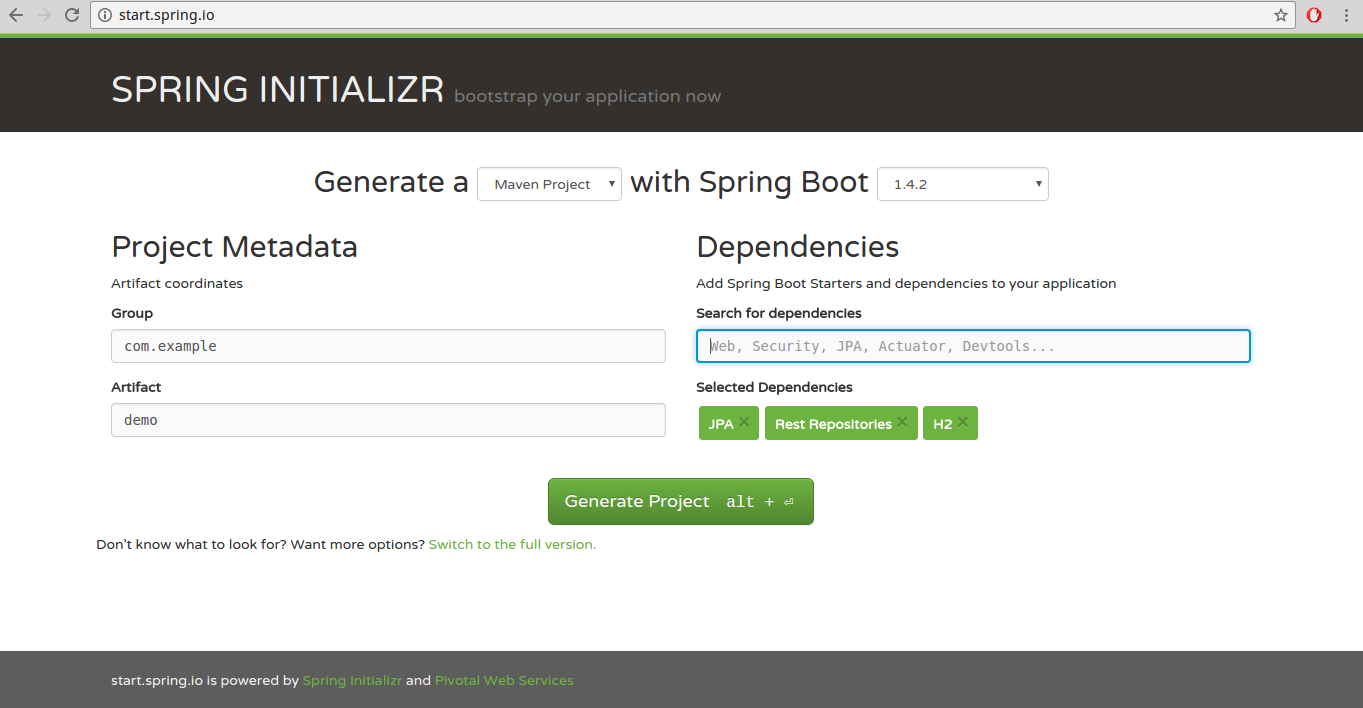
Go to http://start.spring.io/ to generate your Spring Boot (Maven) project. Add dependencies for JPA, Rest Repositories, and H2 and click on Generate Project.
 Extract the zip file and import into your favorite IDE as a Maven project.
2. Add Entity
package com.example;

import javax.annotation.Generated;
import javax.persistence.Entity;
import javax.persistence.GeneratedValue;
import javax.persistence.Id;
import javax.persistence.GenerationType;

@Entity
public class Beer {

    @Id
    @GeneratedValue(strategy=GenerationType.IDENTITY)
    private Long id;
    private String name;
    private Double abv;

    public Beer() {
    }

    public Long getId() {
        return id;
    }

    public void setId(Long id) {
        this.id = id;
    }

    public String getName() {
        return name;
    }

    public void setName(String name) {
        this.name = name;
    }

    public Double getAbv() {
        return abv;
    }

    public void setAbv(Double abv) {
        this.abv = abv;
    }
}
3. Create Rest Repository
The magic happens in the interface below.
By creating an interface which extends CrudRepository, we automatically get a bunch of database repository methods like findAll, findOne, and delete, just to name a few.
By placing the @RepositoryRestResource annotation on top of this interface provides us with the Rest endpoint. By default, Spring will use the pluralized entity name for the endpoint.
package com.example;

import org.springframework.data.repository.CrudRepository;
import org.springframework.data.rest.core.annotation.RepositoryRestResource;

@RepositoryRestResource
public interface RestRepository extends CrudRepository<Beer, Long>{}
4. Database Configuration
Update the src/main/resources/application.properties file with the properties below. Combined with our H2 dependency, Spring Boot will use this to create an in-memory DB for us to play with.
spring.datasource.url=jdbc:h2:mem:test
spring.jpa.hibernate.ddl-auto=create-drop
spring.datasource.driverClassName=org.h2.Driver
spring.jpa.database-platform=org.hibernate.dialect.H2Dialect
spring.jpa.show-sql=true
5. Create Seed Data File
To start off with some data in our in database, lets create a seed file. Simply add a file named data.sql in the src/main/resources directory, and Spring Boot will automatically pick it up and execute it on startup. Place the following contents in the file:
    INSERT INTO beer(name,abv) VALUES('Jai Alai', 7.5);
    INSERT INTO beer(name,abv) VALUES('Stella Artois', 5.0);
    INSERT INTO beer(name,abv) VALUES('Lagunitas IPA', 6.2);
    COMMIT;
6. Run
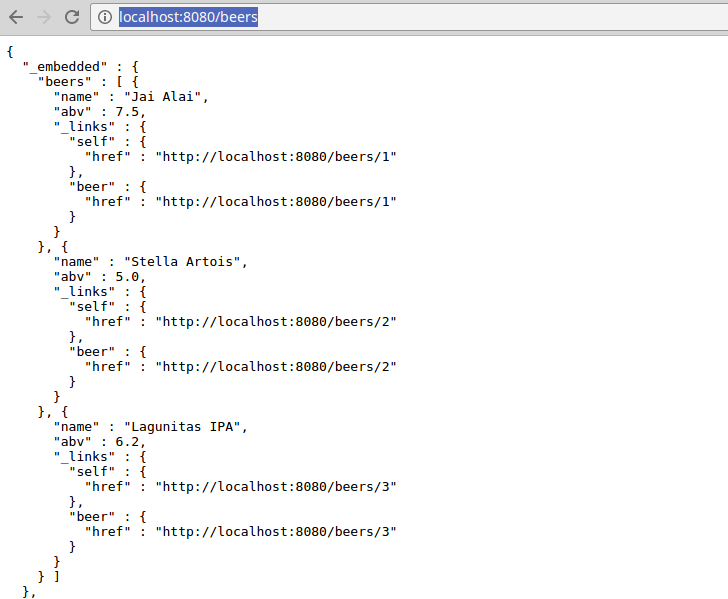
Run the application. Open a browser and go to http://localhost:8080/beers to see the list of beers populated by your seed script.
 Now have fun with it. Try the whole set of HTTP methods.
For example, to delete the first item using curl, simply run:
curl -X DELETE http://localhost:8080/beers/1To add another item, run:
curl -X POST -H "Content-Type:application/json" -d '{ "name": "Utopia", "abv": "30.0" }' http://localhost:8080/beersThat’s it. You now have a full Rest API (with HAL) for your Beer entity! You are now officially as cool as any Flask developer.
