Add a File Selection Dialog To Your VBA Code
There are times in Microsoft Excel or Access when you may require user input regarding the location of a file. For example, you may need to export some data in Access, but need to prompt the user regarding where the data should be saved.
For this example, we will create a simple Access form with one button. Although we are using Access here, the core logic can be used from VBA in any Microsoft product (e.g. Excel, Word).
1. Create a Button
Create a basic form and add a button.
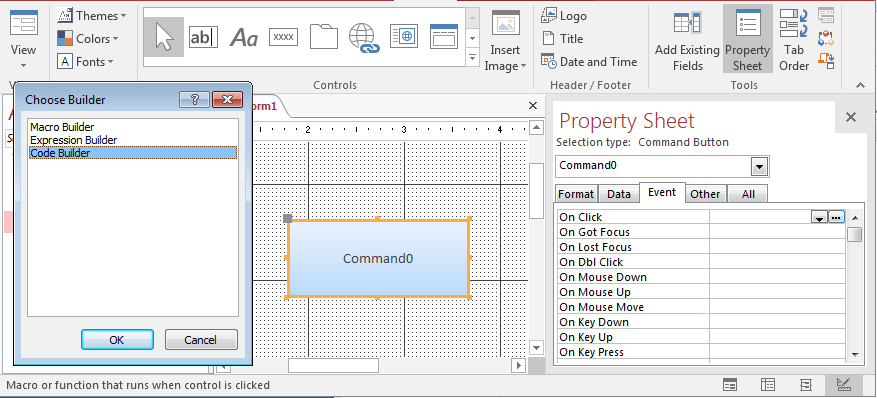
To add code to this button’s event, go to the Property Sheet->Event for the new button and click on ... for the On Click event. In the “Choose Builder” pop-up, select “Code Builder”.

2. Import Required VBA Reference
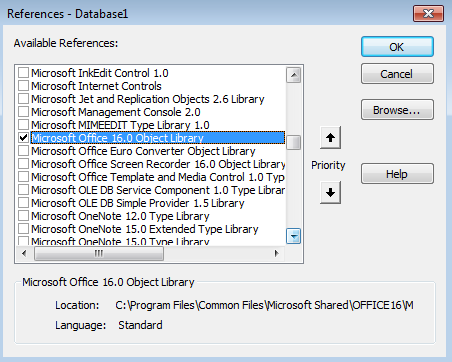
Import the VBA reference required to use the file dialog by going to Tools->References in the VBA editor menu.
Scroll down to the Microsoft Office “VERSION” Object Library entry (Office version may vary), check it, and click OK.

3. Write Event Code
Add the code below to the button’s on-click event procedure.
Private Sub Command0_Click()

    Dim fd As FileDialog
    Dim fileName As String

    Set fd = Application.FileDialog(msoFileDialogOpen)

    'If you'd like to add any filters to what type
    'of file can be selected, use the section below.
    'For the example, we will add a filter for text
    'files onlly.
    With fd
        'Existing filters must be cleared before adding new:
        .Filters.Clear
        .Filters.Add "Text Files", "*.txt"
        'InitialFileName can be used to set initial directory for file dialog:
        .InitialFileName = "C:\Users\Public"
    End With

    fd.Show 'Show file select dialog

    'Set variable "filename" equal to path of file selected:
    fileName = fd.SelectedItems(1)

    'You can now use the filename for the file selected in your code:
    MsgBox fileName

End Sub
4. Test Button
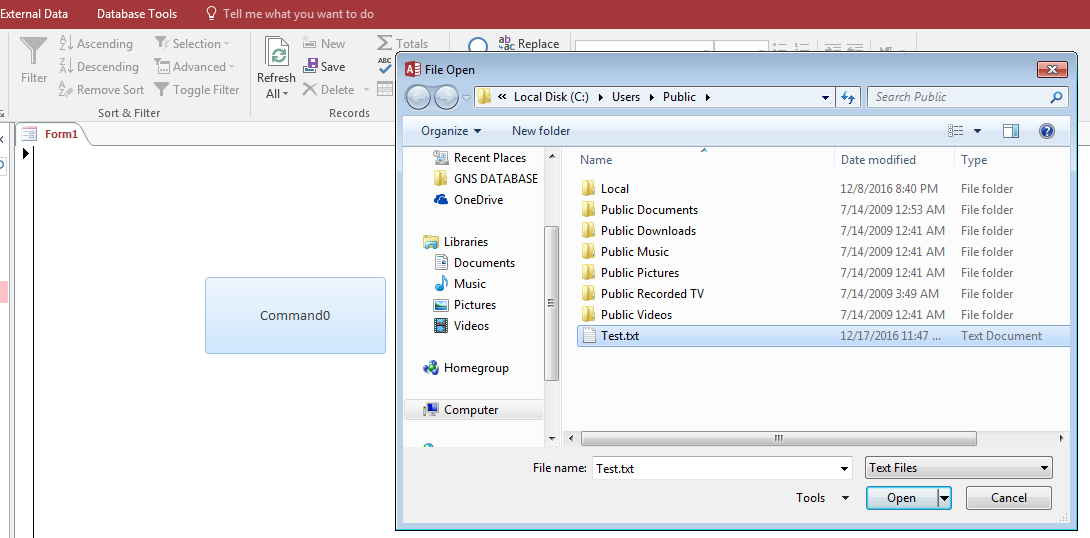
Save the code, go back to the form, and click the button. You should see the file dialog appear.
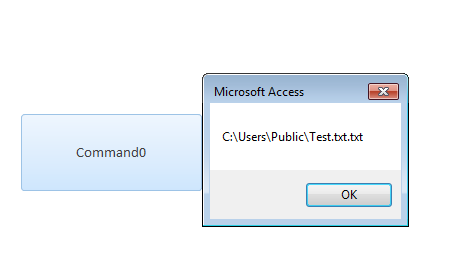
 Select your file, and you should see that the VBA code is able to reference its path.


