Spring Boot Development Using Command Line Only
Intro
So this one is mostly for fun, but I wanted to see how difficult it would be to develop a basic Spring Boot project using command line tools only. While I think most would agree that using a full featured IDE is much more efficient, there are some gray beards out there that are extermely effective with tools like VIM.
Tools
While its possible to get these tools set up in Windows, this walkthrough wil be done using Ubuntu linux. This should work with other *nix based systems like OSX and BSD as well.
- vim - Text editor
- tmux - Terminal Multiplexer - allows multiple windows inside of a command line terminal.
- curl - Command line http client. Well, technically not just http, but thats what we’ll be using it for.
- unzip - We’ll use this to unzip the Spring Initilizr project.
- jdk - We’ll use openjdk 11.
Install Packages
sudo apt update

#Install needed packages.  Its possible that your system already has one to all of these:
sudo apt install vim tmux curl unzip openjdk-11-jdk
Generate Spring Boot Project Using cUrl
Alot of people are now familiar with the super useful website https://start.spring.io , which can easily generate a Spring Boot project for you with all the needed dependencies. But did you know that Pivotal also exposes a command line API with the same functionality?
Knowing nothing about how to generate a project or what options are available, you can simply do a call to curl [https://start.spring.io](https://start.spring.io) .
I won’t list the entire output, but the result will clearly tell you exactly what options you can use in your curl command, including some examples. Below is a snippet of the result.
      .   ____          _            __ _ _
     /\\ / ___'_ __ _ _(_)_ __  __ _ \ \ \ \
    ( ( )\___ | '_ | '_| | '_ \/ _` | \ \ \ \
     \\/  ___)| |_)| | | | | || (_| |  ) ) ) )
      '  |____| .__|_| |_|_| |_\__, | / / / /
     =========|_|==============|___/=/_/_/_/
    :: Spring Initializr ::  https://start.spring.io

    This service generates quickstart projects that can be easily customized.
    Possible customizations include a project's dependencies, Java version, and
    build system or build structure. See below for further details.

    The services uses a HAL based hypermedia format to expose a set of resources
    to interact with. If you access this root resource requesting application/json
    as media type the response will contain the following links:
    +-----------------+------------------------------------------+
    | Rel             | Description                              |
    +-----------------+------------------------------------------+
    | gradle-build    | Generate a Gradle build file.            |
    | gradle-project  | Generate a Gradle based project archive. |
    | maven-build     | Generate a Maven pom.xml.                |
    | maven-project * | Generate a Maven based project archive.  |
    +-----------------+------------------------------------------+

    ...
    Lots of useful info excluded to limit the length of this snippet ...
    ...

    Examples:

    To create a default demo.zip:
    	$ curl https://start.spring.io/starter.zip -o demo.zip

    To create a web project using Java 11:
    	$ curl https://start.spring.io/starter.zip -d dependencies=web \\
    			-d javaVersion=11 -o demo.zip

    To create a web/data-jpa gradle project unpacked:
    	$ curl https://start.spring.io/starter.tgz -d dependencies=web,data-jpa \\
    		   -d type=gradle-project -d baseDir=my-dir | tar -xzvf -

    To generate a Maven POM with war packaging:
    	$ curl https://start.spring.io/pom.xml -d packaging=war -o pom.xml
We’ll do a very simple REST API and persist to a H2 database. My curl command to generate the project would look like the following:
curl https://start.spring.io/starter.zip -d dependencies=h2,data-jpa,data-rest -d javaVersion=11 -o demo.zipThe command includes our three dependencies, specifies that we’ll be using Java 11, and saves the contents to a file named ‘demo.zip.
Lets unzip this file and open up our project.
#Create directory for project:
mkdir myproject

#Move file to new directory and go into folder:
mv demo.zip myproject
cd myproject

#Extract:
unzip demo.zip
The project should look like the following:
.
./.gitignore
./src
./src/main
./src/main/java
./src/main/java/com
./src/main/java/com/example
./src/main/java/com/example/demo
./src/main/java/com/example/demo/DemoApplication.java
./src/main/resources
./src/main/resources/application.properties
./src/test
./src/test/java
./src/test/java/com
./src/test/java/com/example
./src/test/java/com/example/demo
./src/test/java/com/example/demo/DemoApplicationTests.java
./mvnw.cmd
./demo.zip
./mvnw
./pom.xml
./HELP.md
./.mvn
./.mvn/wrapper
./.mvn/wrapper/MavenWrapperDownloader.java
./.mvn/wrapper/maven-wrapper.properties
./.mvn/wrapper/maven-wrapper.jar
vim Setup
There are a few options we need to add to our vim configuration. To do so, lets edit our .vimrc file:
#Open file
vim ~/.vimrc
Add the following to the bottom of the file:
set ts=4 sw=4
set path+=**
set wildmenu- The ts and sw is simply to replace tabs with 4 spaces.
- ‘path+=**’ adds recursive partial search, so we can find a file while inside of vim based on partial name or any part of the filename, including extension only.
- ‘wildmenu’ allows tab through the file names.
Dual Windows with tmux
Now that we have our project, lets use tmux to open a window for vim and one for a command line terminal to execute commands while we develop.
tmuxtmux commands are a little odd, and use the initiator ‘ctrl+b’ followed by the particular key. So for example, ctrl+b, release, then double quote (”) will open a new window panel below the current. It takes a couple of commands to get used to, but its not so bad.
Once in tmux, you can create a new window by using one of the following commands:
- Create new window below: ctrl+b ”
- Create new window to the right: ctrl+b %
- Move between windows: ctrl+b then arrow in particular direction
- Resize current window: ctrl+b+arrow (keep holding ctrl+b while you click the arrow key)
I won’t list all commands, but a good tmux cheat sheet can be found here.
Java Coding in vim
While very basic vim knowledge is assumed, below are pretty much the only commands I know which have actually allowed me to do pretty much anything I want in my development career. While it won’t make you a gray beard, memorize these and you should be fine editing anything.
- i - insert mode
- x - delete current character
- $ - go to end of line
- 0 - go to beginning of line
- / - find something within the current file
- shift+g - go to end of file
- gg - go to beginning of file
- :q! - quit and ignore any changes
- :x - save + quit
- :w - save
- :find - find file recursively inside of current directory. For example, :find *.java will find all java files in directory.
- :ls - list open files in buffer
- :b - change to buffer with id bufferId
- :buffers - shows buffers and associated number id
- ctrl+6 - changes to previous change
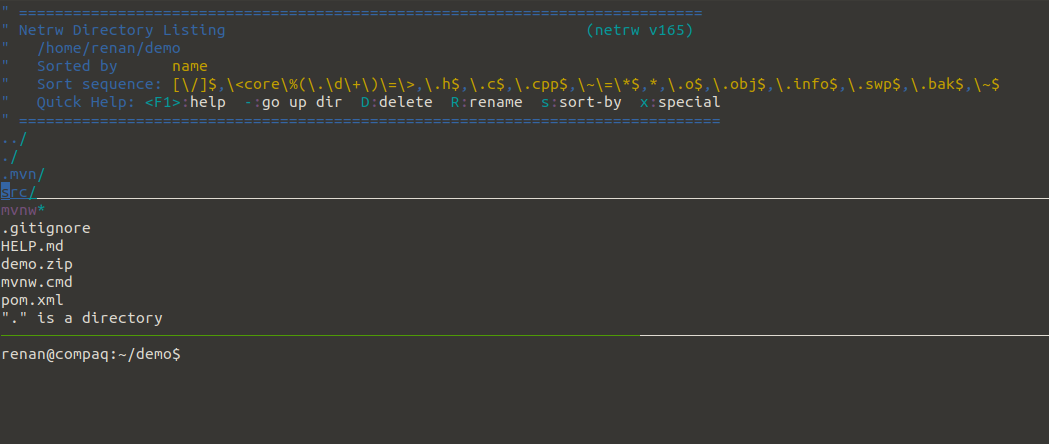
- :edit . - Open directory manager in current directory
- :edit - Open file in buffer
- :f - show full filepath of current file
For consistency sake, I will follow the tutorial listed in my ‘easy REST API’ post. I’ll save you some screen time and won’t actually type out the code as it can be found here - /creating-a-rest-api-effortlessly-with-spring-rest-repositories/ .
After creating my classes, I am able to execute my application by using the following inside of the project root:
./mvnw spring-boot:runIn The End
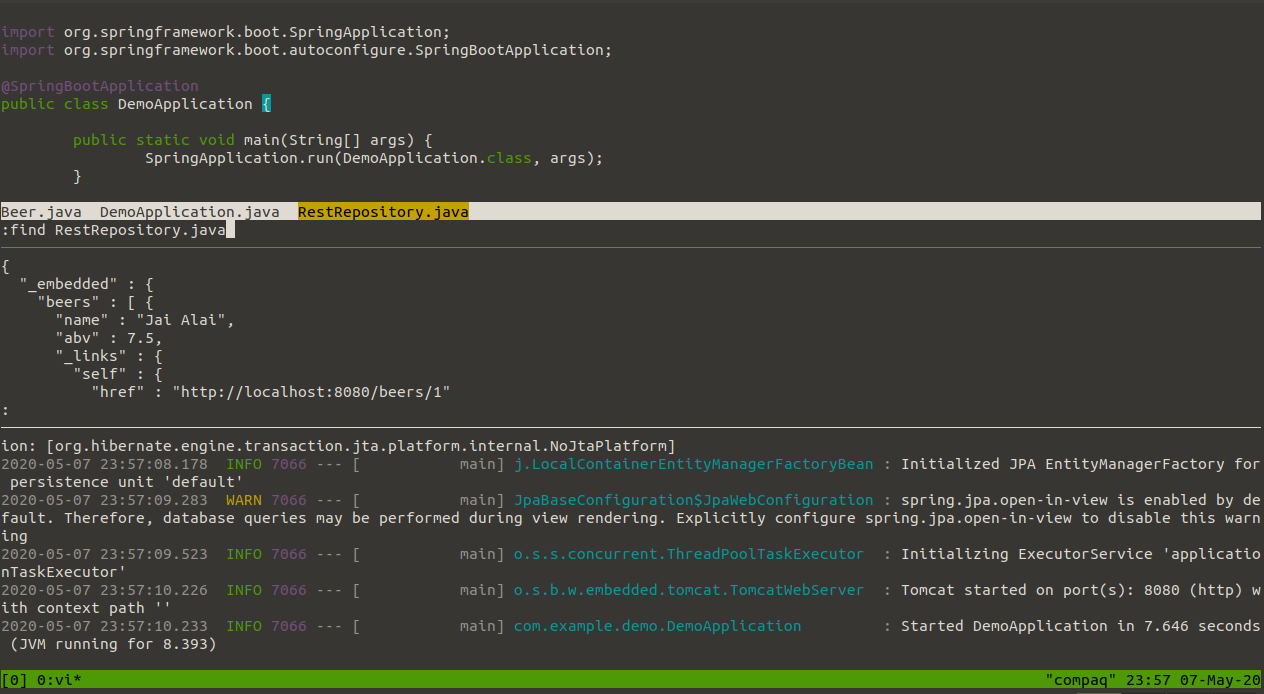
I can then open a new tmux panel and execute my curl commands. In the end, you will have something like the below. Honestly, I knew that I wasnt going to convince myself to give away my IDEs anytime soon, but wanted to have a little command line fun.


