Creating a Rest API Effortlessly with Spring Rest Repositories - Kotlin Edition!
I’ve been recently experimenting with Kotlin, and I am absolutely hooked. Its concise syntax and fix of most Java “annoyances” makes it the best Java alternative in the JVM for me to date. Combine that with Spring Boot, and the JVM is now a hip place to be :)
This particular post is a Kotlin version of my Spring Rest Repositories post found here.
Using Spring Boot and Spring Data Rest, we can now develop a fully restful endpoint in just a few super easy steps. If you don’t believe me, keep reading. You will turn into a Spring Boot fanatic like me in just 6 steps from now.
For our example, we will create a simple Rest endpoint to manage a table of favorite beers.
1. Generate a Spring Boot Project
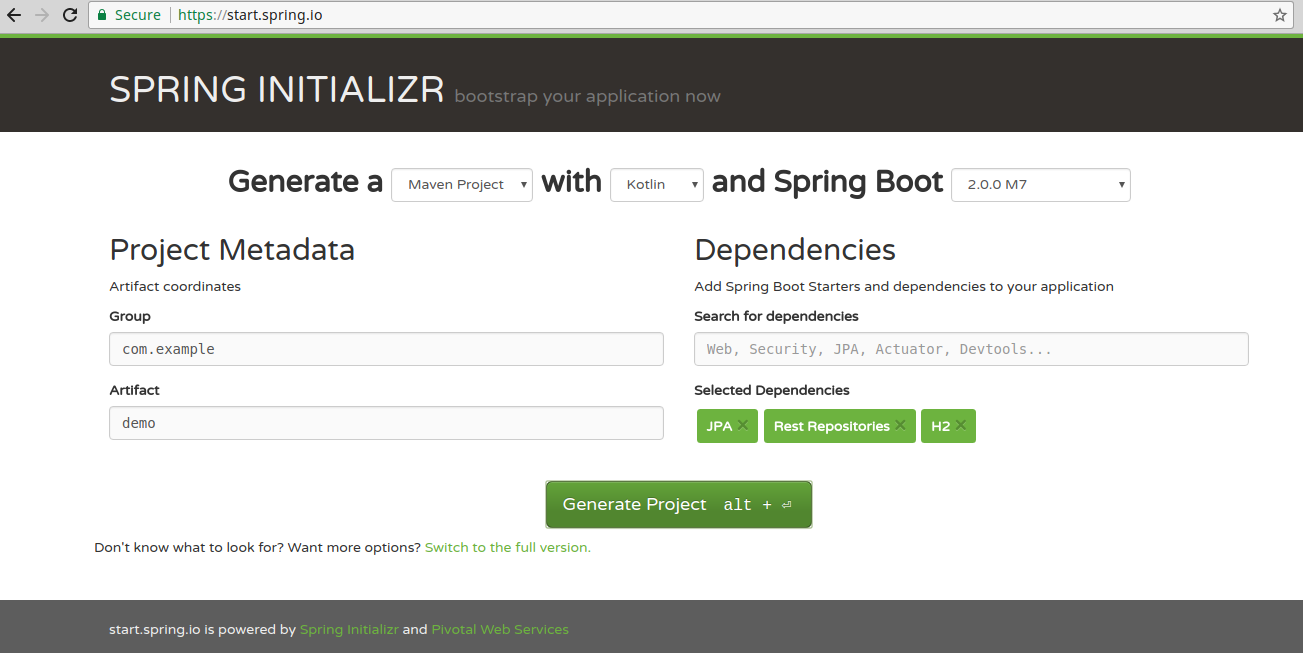
Go to http://start.spring.io/ to generate your Spring Boot (Maven) project. Ensure that you have “Kotlin” selected as your language, and Spring Boot version 2.0.0 and up. Add dependencies for JPA, Rest Repositories, and H2 and click on Generate Project.
 Extract the zip file and import into your favorite Kotlin compatible IDE as a Maven project. At this time, I recommend IntelliJ Community Edition, as its creator, Jetbrains, is also the creator of Kotlin itself.
2. Add Entity
File: Beer.kt @ com.example.demo package
Notice the super concise syntax compared to its Java alternative; even better than having Lombok built in with Java. Although Kotlin enforces null safety by default, I prefer to allow nulls when it comes to database entity classes since database values may also be null.
package com.example.demo

import javax.persistence.Entity
import javax.persistence.GeneratedValue
import javax.persistence.GenerationType
import javax.persistence.Id

@Entity
class Beer(
        var name: String? = null,
        var abv: Double? = null,
        @Id
        @GeneratedValue(strategy = GenerationType.AUTO)
        var id: Long? = null
)
3. Create Rest Repository
File: BeerRepository.kt @ com.example.demo package
The magic happens in the interface below.
By creating an interface which extends CrudRepository, we automatically get a bunch of database repository methods like findAll, findOne, and delete, just to name a few.
By placing the @RepositoryRestResource annotation on top of this interface provides us with the Rest endpoint. By default, Spring will use the pluralized entity name for the endpoint.
package com.example.demo

import org.springframework.data.repository.CrudRepository
import org.springframework.data.rest.core.annotation.RepositoryRestResource

@RepositoryRestResource
interface BeerRepository : CrudRepository<Beer, Long>
4. Database Configuration
Update the src/main/resources/application.properties file with the properties below. Combined with our H2 dependency, Spring Boot will use this to create an in-memory DB for us to play with.
spring.datasource.url=jdbc:h2:mem:test
spring.jpa.hibernate.ddl-auto=create-drop
spring.datasource.driverClassName=org.h2.Driver
spring.jpa.database-platform=org.hibernate.dialect.H2Dialect
spring.jpa.show-sql=true
5. Update DemoApplication.kt File to Seed Data
To start off with some data in our in database, add some seed logic to our DemoApplication.kt file. Update your DemoApplication file as show below.
package com.example.demo

import org.springframework.boot.CommandLineRunner
import org.springframework.boot.autoconfigure.SpringBootApplication
import org.springframework.boot.runApplication
import org.springframework.context.annotation.Bean

@SpringBootApplication
class BeerApplication {
    @Bean
    fun init(repository: BeerRepository) = CommandLineRunner {
        repository.save(Beer(name = "Jai Alai", abv = 7.5))
        repository.save(Beer(name = "Stella Artois", abv = 5.0))
        repository.save(Beer(name = "Lagunitas IPA", abv = 6.2))
    }
}

fun main(args: Array<String>) {
    runApplication<BeerApplication>(*args)
}
6. Run
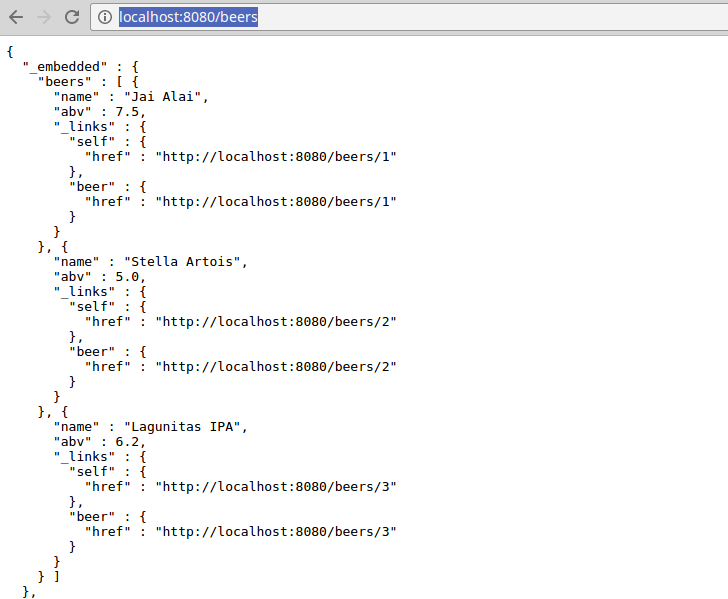
Run the application. Open a browser and go to http://localhost:8080/beers to see the list of beers populated by your seed script.
 Now have fun with it. Try the whole set of HTTP methods.
For example, to delete the first item using curl, simply run:
curl -X DELETE http://localhost:8080/beers/1To add another item, run:
curl -X POST -H "Content-Type:application/json" -d '{ "name": "Utopia", "abv": "30.0" }' http://localhost:8080/beersThat’s it. You now have a full Rest API (with HAL) for your Beer entity! The magic of Spring Boot combined with Kotlin now makes the JVM a fun place to be once again.

